Vanilla Nut Granola Recipe
Starting your day with a wholesome, flavorful breakfast can set the tone for everything that follows. If you’re looking for a nutritious and satisfying option, a vanilla nut granola recipe might just be the perfect solution. This simple yet delicious granola combines the crunchiness of oats with the richness of nuts and the sweet warmth of vanilla. Whether you’re looking for a healthy snack, a yogurt topping, or a nutritious breakfast, this homemade granola recipe is sure to hit the mark.
Why Choose Homemade Vanilla Nut Granola?
There’s something special about homemade granola. Unlike store-bought versions filled with preservatives and artificial ingredients, vanilla nut granola made at home ensures that you’re eating fresh, wholesome ingredients. Plus, you can customize it to fit your exact taste preferences. Whether you like a mix of almonds, walnuts, or even hazelnuts, this granola recipe is versatile and can be adjusted to suit your dietary needs.
In addition to the obvious flavor benefits, homemade granola is also far more economical. With just a few basic ingredients, you can make a large batch of granola that will last for weeks, saving you both money and the frustration of reading ingredient labels at the store.

image/Vanilla Nut Granola Recipe
Health Benefits of Vanilla Nut Granola
One of the best things about this vanilla nut granola recipe is that it doesn’t just taste great—it’s packed with nutrients that benefit your body in many ways. Here are some of the key health benefits:
- High in Fiber: Oats are a rich source of soluble fiber, which can help lower cholesterol levels, improve digestion, and promote a healthy gut.
- Rich in Healthy Fats: Nuts like almonds, walnuts, and cashews are high in heart-healthy fats, which support brain function and help maintain healthy skin.
- Natural Energy: With a combination of oats, nuts, and a touch of maple syrup, this granola provides sustained energy throughout the day without causing blood sugar spikes.
- Customizable: You can adjust the recipe to make it gluten-free, vegan, or even low-sugar, depending on your personal dietary preferences.
Key Ingredients for Vanilla Nut Granola
To make your vanilla nut granola recipe, you’ll need some basic ingredients. Here’s what you’ll need, plus some tips on how to customize it:
| Ingredient | Quantity | Description |
|---|---|---|
| Old-Fashioned Oats | 3 cups | The base of your granola, providing fiber and texture. |
| Mixed Nuts | 1.5 cups | Almonds, walnuts, pecans, or your favorite combination. |
| Maple Syrup | 1/4 cup | Natural sweetness that pairs perfectly with the vanilla flavor. |
| Vanilla Extract | 2 tsp | The star ingredient that brings the granola its signature flavor. |
| Coconut Oil | 1/4 cup | Adds richness and ensures that the granola crisps up nicely. |
| Ground Cinnamon | 1 tsp | Adds warmth and depth of flavor, complementing the vanilla. |
| Salt | 1/4 tsp | Balances the sweetness and enhances the flavor. |
| Dried Fruit (Optional) | 1/2 cup | Cranberries, raisins, or apricots for added texture and sweetness. |
The beauty of this recipe is in its flexibility. Feel free to swap out nuts, use honey instead of maple syrup, or add in seeds like sunflower or pumpkin for extra crunch.
Step-by-Step Instructions to Make Vanilla Nut Granola
Now that you have all the ingredients, it’s time to bring this vanilla nut granola recipe to life! Follow these simple steps to create a batch of delicious, crunchy granola:
Preparation Time & Cooking Time
- Preparation Time: 10 minutes
- Cooking Time: 25-30 minutes
Instructions
- Preheat Your Oven
Preheat your oven to 350°F (175°C). Line a large baking sheet with parchment paper to prevent sticking and make cleanup easier. - Mix the Wet Ingredients
In a medium bowl, combine the maple syrup, coconut oil, vanilla extract, and cinnamon. Stir until the coconut oil melts and the ingredients are well-combined. - Add the Dry Ingredients
In a separate large bowl, combine the oats, nuts, and salt. Mix thoroughly, then pour in the wet ingredients. Stir until the oats and nuts are evenly coated with the sweet, fragrant mixture. - Spread on the Baking Sheet
Pour the granola mixture onto the prepared baking sheet. Spread it out into an even layer, ensuring that no parts are overcrowded—this will help the granola crisp up evenly. - Bake the Granola
Place the baking sheet in the preheated oven and bake for 20-30 minutes. Stir the granola halfway through the baking time to ensure it bakes evenly. Keep a close eye on it in the last few minutes to prevent burning. The granola should be golden brown and smell delicious. - Cool and Add Dried Fruit (Optional)
Once the granola is baked to a perfect golden brown, remove it from the oven and let it cool completely. Once cooled, add your dried fruit (if using), and stir to combine. - Store Your Granola
Store the granola in an airtight container. It will stay fresh for up to two weeks, though it’s so tasty it might not last that long!
Tips for Perfecting Your Vanilla Nut Granola
To ensure that your granola turns out perfectly every time, keep these expert tips in mind:
- Don’t Overcrowd the Baking Sheet: Spread the granola in a thin, even layer on the baking sheet. Overcrowding can cause uneven cooking and result in soggy granola.
- Stir Gently: Stir the granola every 10 minutes to ensure it cooks evenly. Be careful not to break up the clusters too much—you want to keep them intact for a nice, crunchy texture.
- Check the Granola Frequently: Oven temperatures can vary, so keep an eye on your granola towards the end of the cooking time to prevent it from burning.
- Customize Your Granola: Feel free to add other ingredients like coconut flakes, chia seeds, or hemp hearts for added texture and nutrition.

How to Serve Vanilla Nut Granola
Once your homemade granola is ready, there are endless ways to enjoy it. Here are a few ideas:
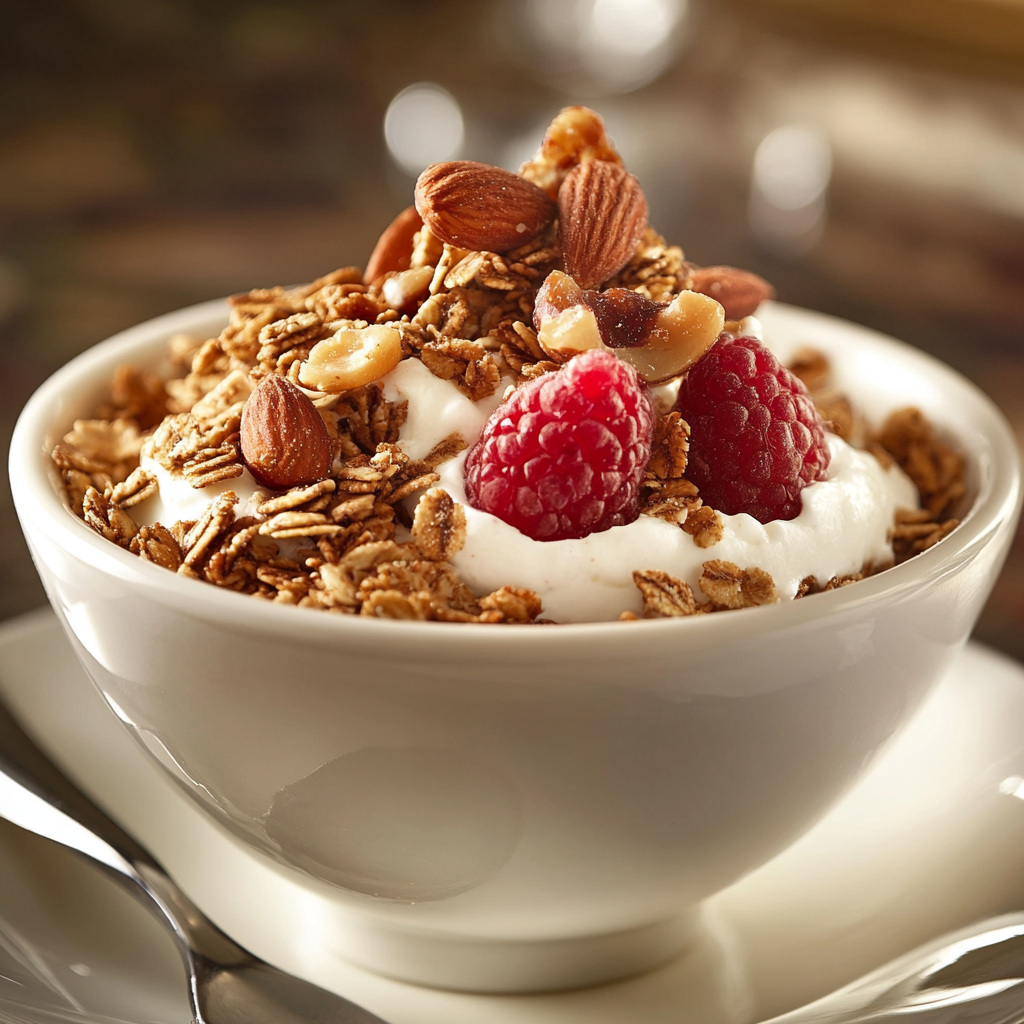
- Top Your Yogurt: Add a generous scoop of granola on top of your morning yogurt for a crunchy and flavorful breakfast.
- Make Granola Cereal: Pour your favorite milk over the granola and enjoy it as a crunchy, nutritious cereal.
- Eat it as a Snack: Grab a handful of granola for a quick and healthy snack that will keep you full and satisfied.
- Use it in Smoothies: Sprinkle granola on top of your smoothies or smoothie bowls for added crunch and texture.
- Serve as a Dessert: Top your fresh fruit or ice cream with a handful of granola for a light and delicious dessert.
Variations of Vanilla Nut Granola
This vanilla nut granola recipe is versatile and can be customized to your preferences. Here are a few variations you can try:
- Add More Seeds: For an extra nutritional boost, add chia seeds, flaxseeds, or pumpkin seeds.
- Try Different Sweeteners: Swap the maple syrup for honey, agave, or coconut sugar for a different flavor profile.
- Use Other Nuts: Experiment with different nuts such as pistachios, hazelnuts, or cashews to create your perfect granola mix.
- Go Chocolate: Add dark chocolate chips or cocoa nibs to your granola once it’s cooled for a chocolatey twist.
FAQs About Vanilla Nut Granola Recipe
Q1: Can I make this granola gluten-free?
Yes! To make this granola gluten-free, simply use certified gluten-free oats.
Q2: How long will this granola stay fresh?
Stored in an airtight container, your granola will stay fresh for up to two weeks. If you want to keep it longer, you can freeze it for up to three months.
Q3: Can I add protein powder to the granola?
Absolutely! If you want to boost the protein content, you can add a scoop of your favorite protein powder to the wet ingredients.
Q4: How do I prevent my granola from burning?
Keep an eye on your granola as it bakes. Stir it halfway through and check frequently during the last few minutes of baking. If necessary, you can reduce the oven temperature by 10-15°F to prevent it from browning too quickly.
Conclusion
Making your own granola doesn’t have to be complicated. With just a few basic ingredients and a little time, you can create a batch of vanilla nut granola that’s not only delicious but also packed with nutrition. Whether you enjoy it as a topping, a snack, or a cereal, this homemade granola is bound to become a staple in your kitchen. Plus, with the ability to customize the ingredients to suit your preferences, it’s easy to make this recipe your own.


